
Eclipse Spyder FWD L4-2350cc 2.4L SOHC 16 Valve (1996)
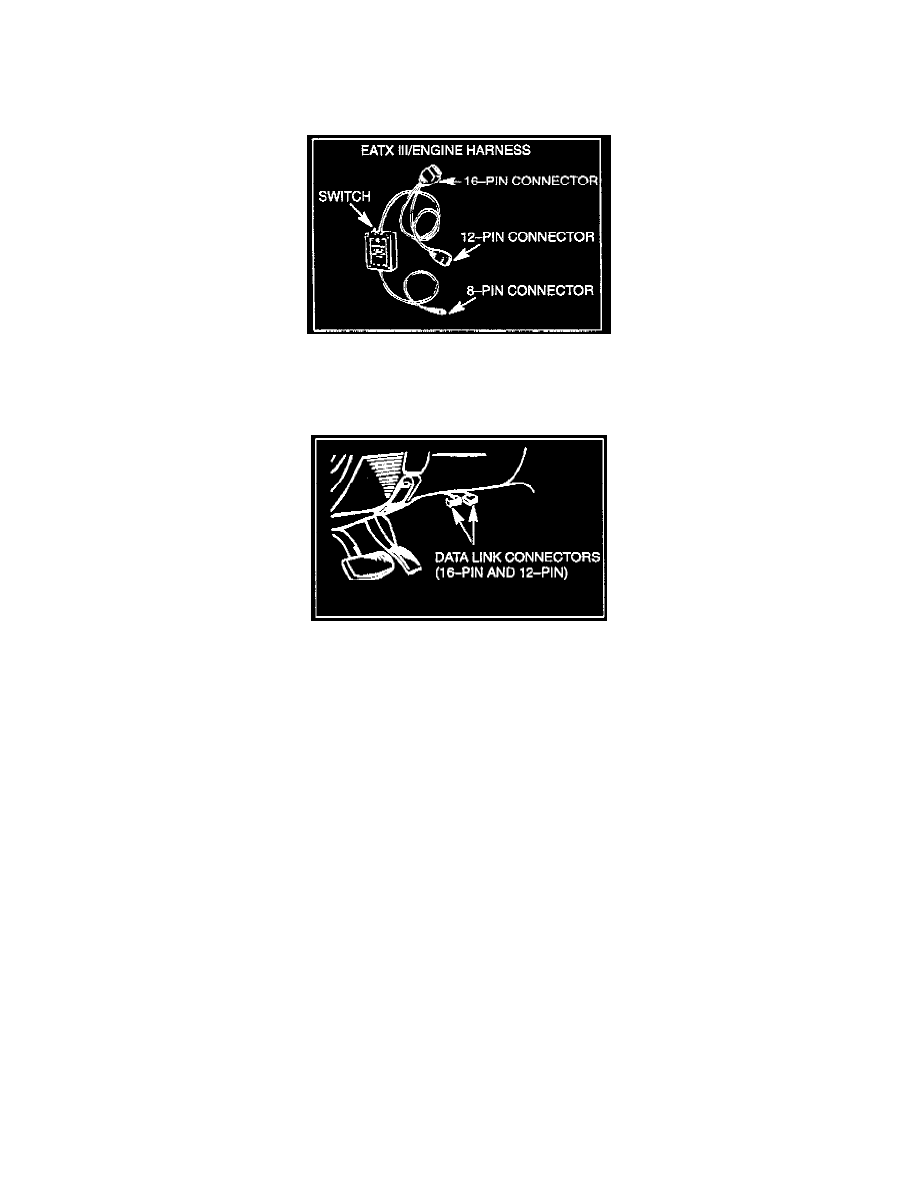
EATX III/Engine Harness
Tool No. MIT992001
Engine Compartment and Control
Part No. MSSF-023G-00
Module Labels
CAUTION: Do not install the cartridge into the Reprogramming Unit at this time.
3.
Attach the EATX III/Engine hamess 8pin connector to the Reprogramming Unit as described in page 6 of the Reprogramming Unit Instruction
Manual.
4.
Set the switch on the harness black box to the side labeled TRANSMISSION.
5.
Connect the EATX III/Engine hamess 16pin and 12-pin connectors to the vehicle's data link connectors located under the instrument panel on the
driver's side.
6.
Install Reprogramming Cartridge MIT992011 into the Reprogramming Unit.
CAUTION: Do not disturb the harness cables or connections. Interruption during the reprogramming process could cause the TCM to lose
programming data, or prevent future TCM reprogramming.
7.
Follow the instructions displayed on the Reprogramming Unit screen.
8.
The display will ask if you want to change the transmission controller part number. Select Yes. Reprogramming will begin.
NOTE: If the TCM cannot be reprogrammed, the displayed current and replacement TCM part numbers will be the same, or the message "BREAK
NOT SEEN" will display. If so, do not continue with this reprogramming procedure.
9.
The current and replacement TCM part numbers will display. Record the displayed replacement TCM part number.
10.
When reprogramming is completed, disconnect the Reprogramming Unit and EATX III/Engine harness.
11.
Test drive the vehicle to ensure that the transaxle shifts normally.
12.
Using the MUT-II scan tool, check if any DTCs have been set in the TCM or the Powertrain Control Module (PCM). Perform any required DTC
troubleshooting and repairs.